Mastering Grungy, Ink & Grunge Brushes
Adding texture to digital designs is one of the fastest ways to inject personality and depth into otherwise flat compositions. Whether you are designing a vintage poster, creating edgy social media graphics, or simply trying to break away from the sterile perfection of vector shapes, grungy brush tools are essential assets in your creative toolkit. These brushes simulate the organic imperfections of real-world media, such as dried ink, worn paper, and rough charcoal, allowing you to create authentic, tactile visuals with just a few clicks.
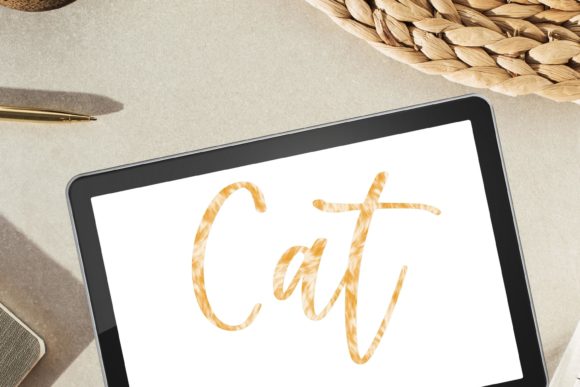
The appeal of a grunge brush lies in its ability to introduce controlled chaos. In professional design, "perfect" often translates to "boring." By incorporating irregular edges, splatters, and distressed marks, you guide the viewer’s eye and add a layer of visual interest that keeps them engaged. An ink brush, specifically, offers a unique blend of fluidity and sharpness, mimicking the behavior of traditional calligraphy pens or sumi-e painting techniques. When combined, these tools allow for a vast range of expressive possibilities, from subtle background textures to bold, statement-making typography.
Understanding the Core Characteristics
To use these tools effectively, it helps to understand what sets them apart from standard digital brushes. A typical round brush produces uniform, clean lines. In contrast, a grungy brush is designed with built-in variability. It might have gaps in the stroke, varying opacity, or rough edges that mimic the way paint catches on textured paper. This randomness is not a bug; it is the primary feature. It saves designers hours of manual editing because the texture is baked directly into the brush stroke.
An ink brush focuses more on the flow and pressure sensitivity of the medium. It captures the dynamic range of traditional ink, where a light touch creates a hairline thread and heavy pressure results in a broad, saturated blot. This makes it ideal for hand-lettering, logos, and illustrations that require a human touch. Meanwhile, a broader grunge brush might be used for laying down large areas of distress, such as simulating a torn edge on a photograph or adding a weathered look to a geometric shape.
Versatile File Formats for Every Workflow
One of the most significant advantages of modern digital brush packs is their compatibility across various software ecosystems. When you acquire a high-quality brush set, you are not limited to a single application. The versatility of file formats ensures that you can integrate these textures into almost any project, regardless of your preferred tools.
For vector-based work, having access to AI, EPS, and SVG files is crucial. These formats allow you to scale your grunge elements infinitely without losing quality. You can drag an SVG grunge overlay directly into Adobe Illustrator, expand it, and use it as a clipping mask for text or shapes. This is particularly useful for logo design, where scalability is non-negotiable. The AI Brush format allows for even more flexibility within Illustrator, enabling you to paint vector paths that retain their editable properties.
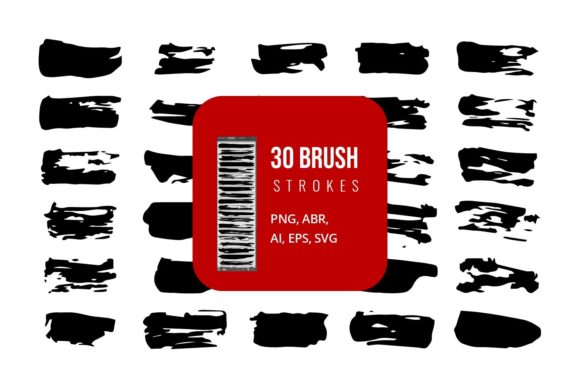
For raster-based editing and digital painting, the ABR Brush format is the industry standard for Adobe Photoshop. Installing an ABR file gives you immediate access to pressure-sensitive brushes that react to your tablet pen, providing a natural drawing experience. However, the utility does not stop at Adobe products. Many of these textures are also available as high-resolution JPG and PNG files. A PNG with a transparent background is incredibly valuable for quick compositing. You can drop a grunge texture over a photo in Microsoft PowerPoint, Canva, or even Microsoft Word to instantly elevate the visual quality of a presentation or document.
Practical Applications in Design and Business
The use cases for these brushes extend far beyond fine art. For entrepreneurs and small business owners, branding is about storytelling. A coffee shop might use an ink brush style for its logo to convey artisanal craftsmanship and tradition. A music festival promoter might rely on heavy grunge brush textures to communicate energy, rebellion, and raw excitement. By choosing the right texture, you align the visual aesthetic with the brand’s voice.
In digital marketing, standing out in a crowded feed is challenging. Clean, corporate designs often blend together. Using a grungy brush to frame a product photo or to highlight a sale announcement can stop the scroll. The irregular edges create a subconscious cue that the content is different, prompting users to pause and engage. Similarly, bloggers and content creators can use these textures to break up long sections of text, adding visual headers or dividers that maintain reader interest.
Educators and presenters also benefit from these tools. A history teacher creating slides about the Industrial Revolution might use distressed textures to evoke the era’s aesthetic. A business consultant pitching a rugged outdoor gear line could use ink brush elements to suggest adventure and durability. The key is relevance; the texture should support the message, not distract from it.
Getting Started: Tips for Beginners
If you are new to using textured brushes, start with simplicity. Overusing grunge effects can make a design look cluttered and unprofessional. Begin by applying a subtle grunge brush stroke to a single element, such as a button or a headline, to see how it interacts with the rest of the layout. Pay attention to contrast; dark grunge textures work best on light backgrounds, and vice versa.
Experiment with blending modes in Photoshop or Illustrator. Overlay, Multiply, and Screen modes can integrate your ink brush strokes more naturally into underlying images, making them look like they were printed on the same surface rather than just sitting on top. When using ABR Brush files in Photoshop, adjust the spacing and jitter settings to customize the level of randomness. This allows you to tailor the brush to your specific needs, whether you want a sparse splatter or a dense, chaotic smear.
Remember that these tools are meant to enhance your creativity, not replace fundamental design principles. Always ensure that text remains legible and that key information is not obscured by excessive texture. With practice, you will develop an intuition for when to apply a light touch and when to go bold.
Choosing the Right Tools for Your Needs
Before downloading or purchasing a brush pack, consider your primary workflow. If you work mainly in vector software, prioritize packs that include AI, EPS, and SVG formats. If you are a digital painter, ensure the ABR Brush files are compatible with your version of Photoshop. For general office use or quick edits, verify that high-quality JPG and PNG options are included.
Look for variety within the pack. A good collection should offer different types of distress—some fine and scratchy, others bold and blocky. This diversity ensures you have the right tool for every project, from delicate invitations to bold streetwear designs. By understanding the capabilities of Grungy Brush, Grunge Brush, and Ink Brush assets, you can streamline your design process and create compelling, textured visuals that resonate with your audience.